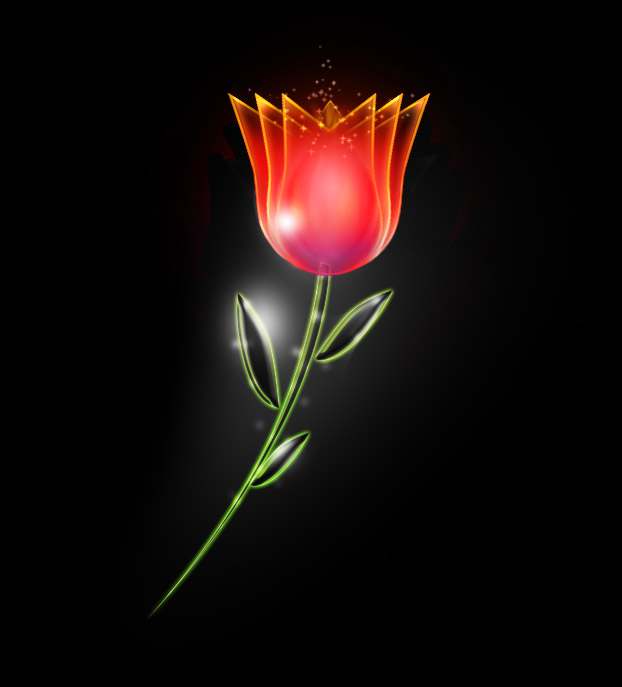
Learn how to create a digital flower with this photoshop tutorial
Now right click on the layer in the Layers Palette and apply a gradient to this layer from #ff3237 to #ff9b01: Duplicate this layer, on the new layer apply a Gaussian Blur filter with the radius set to about 4-7 px then duplicate this layer 2 times.
 Select the last three layers you created and merge them (you can go to the Layer menu and choose Merge Layers or CTRL+E).
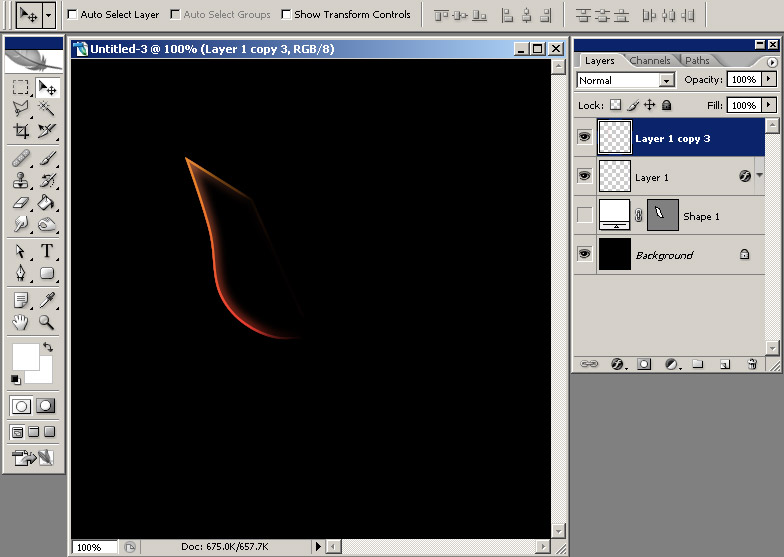 Duplicate this layer again and choose Edit > Free Transform and then right click and choose skew and skew it to right like you see in the picture below:
 Now press CTRL+ALT+SHIFT+T and you should obtain something similar to this:
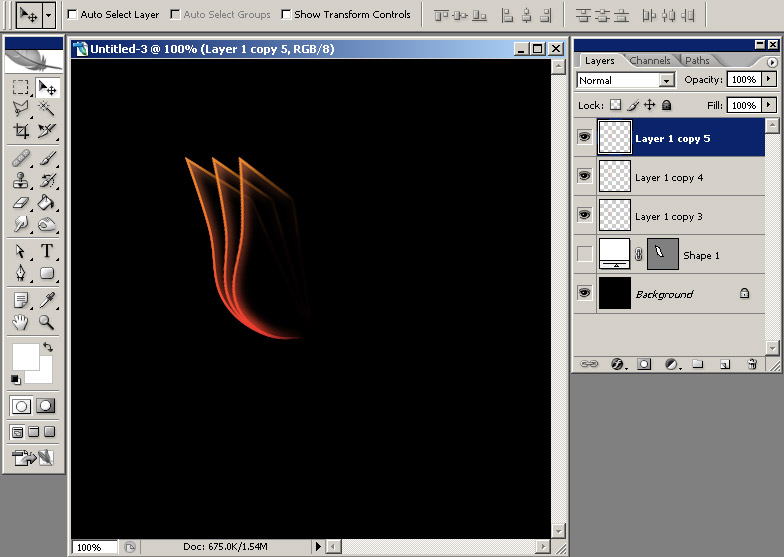 Group the last 3 layers and then duplicate the group and go to Edit > Free Transform and choose Flip Horizontal. Arrange the 2 groups like you see below and you will obtain something that starts to look like a flower:
 Here you can see the 3 layers that a group contains:
 Make a selection aroud the flower:
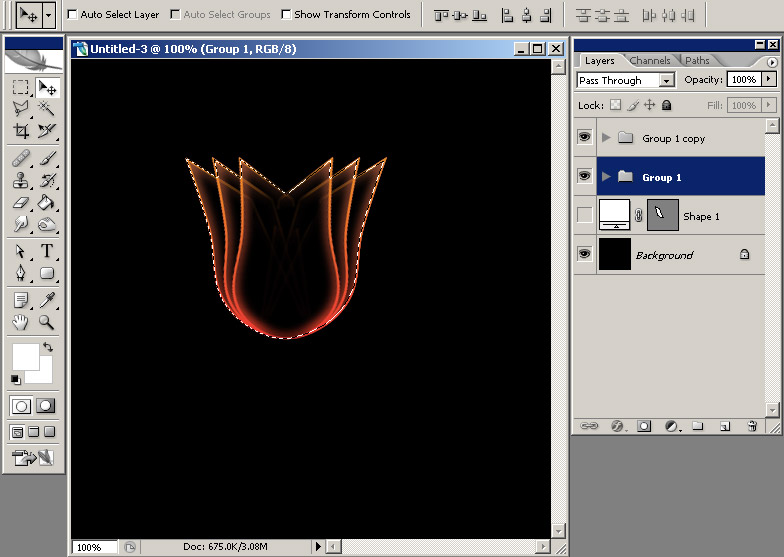 Create a new layer and fill it with a color;it doesn't matter what color, mine is white. This layer should be arranged below all the layers.
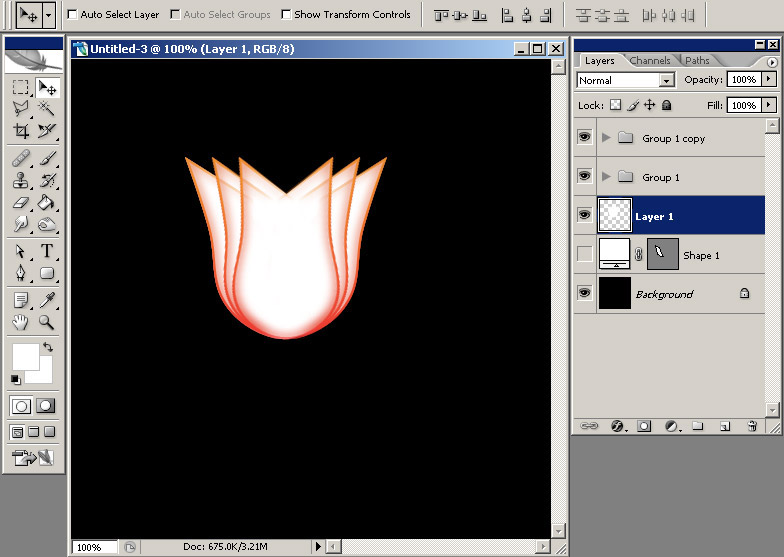 Apply a Gradient Overlay style with these 2 colors: #ff9997 and #fc0100 with a radial style.
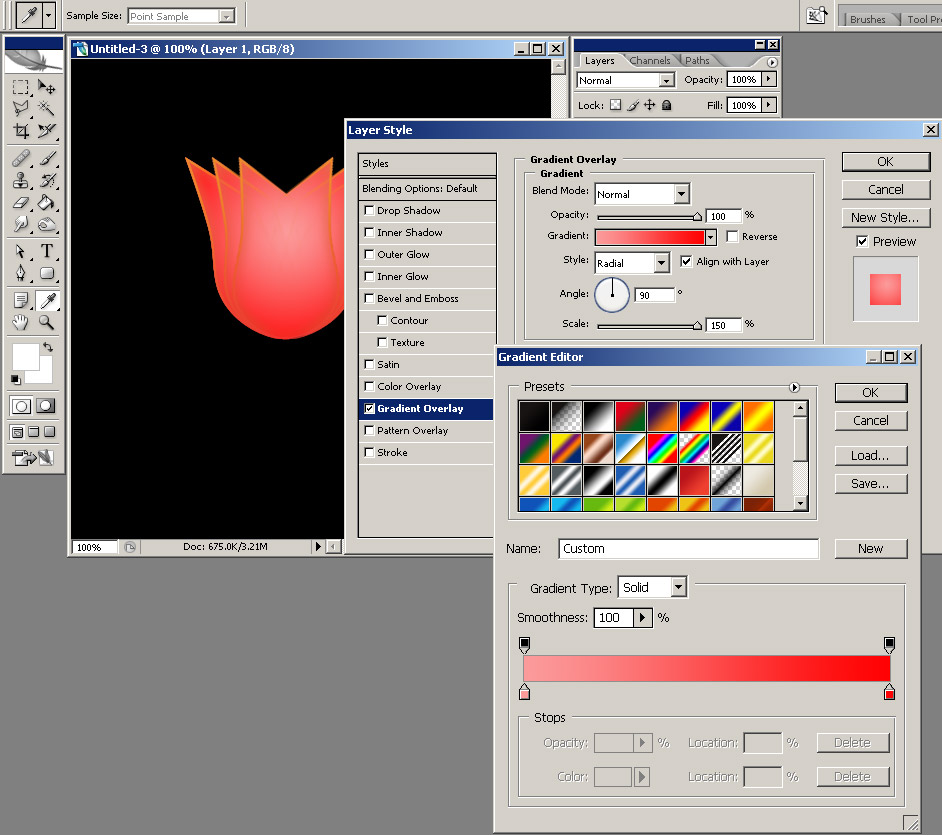 With a Soft Round brush of 90-100 px delete the upper part of this layer and on the sides.
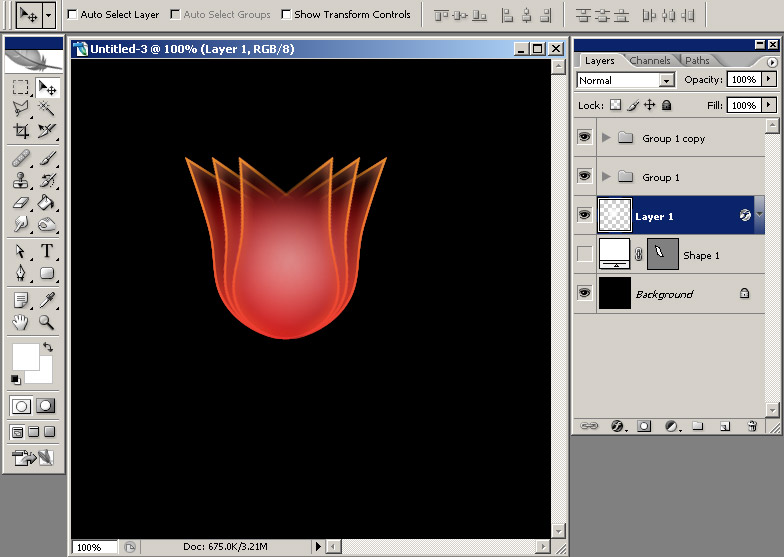 Create a new layer and using the same brush and with the Foreground color set to #f08c2c click once:
 Go to Filter > Blur > Gaussian Blur and choose a higher value for the Radius (I used 35 px).
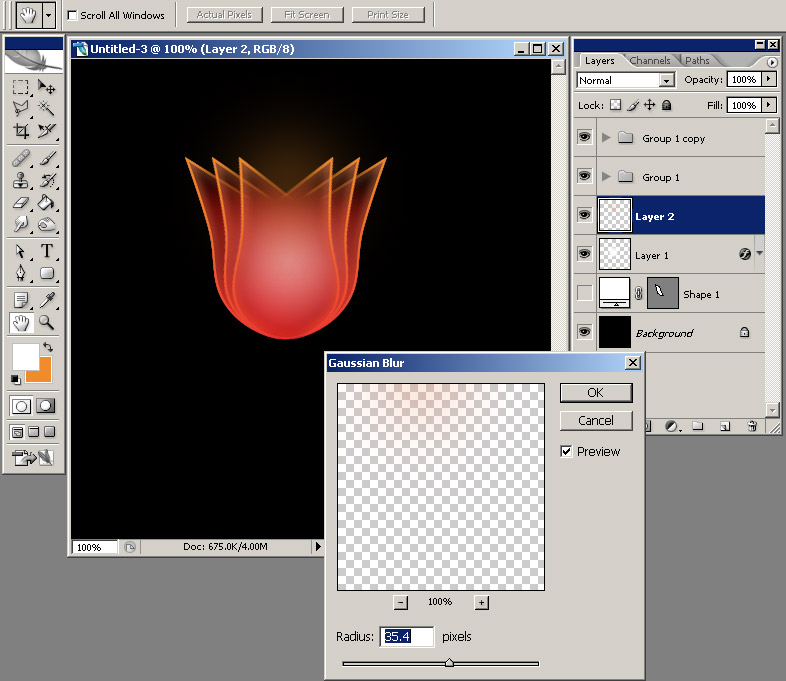 Create a new layer above all the layers and using the same brush and with the Foreground color set to white click again once. You should have something like this:
 You can enhance the saturation of the colors, apply other effects, just let your imagination go free. Here is what I came up with: